
")
")


School Holiday Fun: Create A Jellyfish Salt Painting
Calling all kids who love bubbles: Why not combine art exploration with bubbles? This Jellyfish Bubble project allows you to do just that, and more. In this fun sensory activity, you’ll make a bubble print background and top it off with a rainbow jellyfish salt painting.
What is salt painting? It’s essentially white glue and salt, which creates a lovely raised texture to paint on. Paint has an interesting “spread” effect when it touches salt and the colours run into each other beautifully. A mix of science and art, salt paintings can be done over and over in numerous designs. Get ready to experiment!
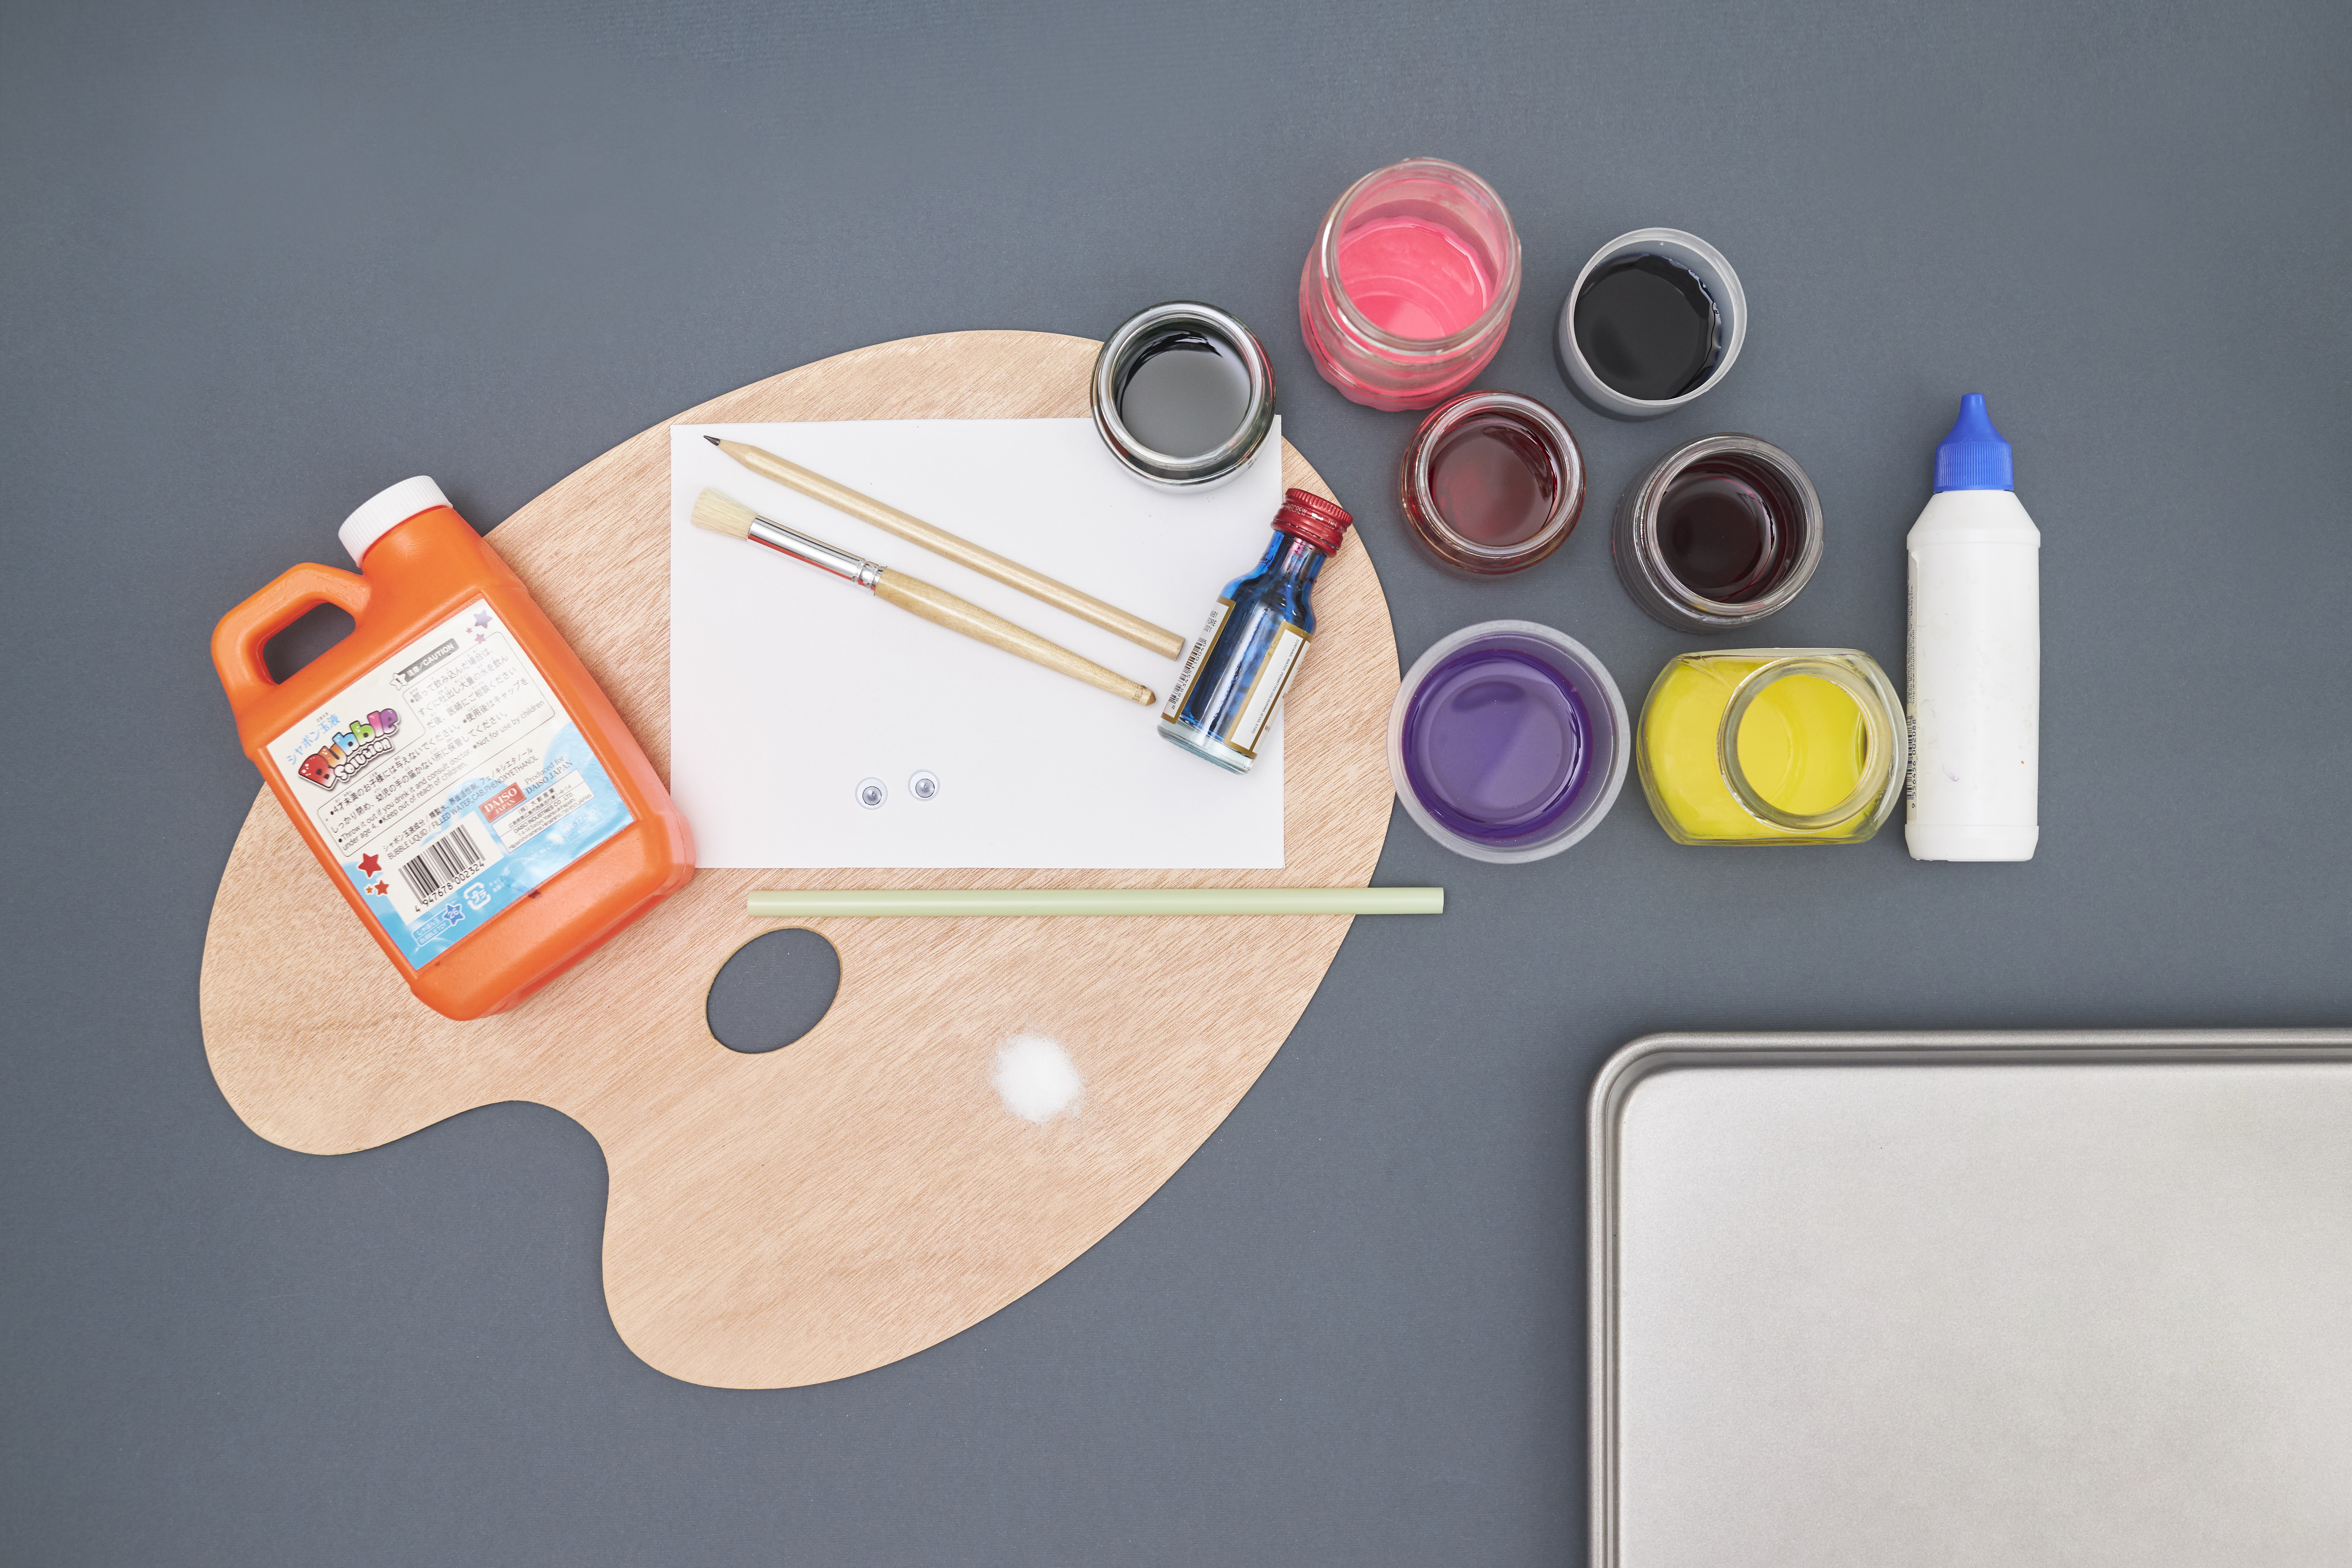
You’ll need:
· Bubble solution
· Blue food colouring
· 1 plate with a high edge
· 1 baking tray or food tray
· 1 straw
· 1 sheet of cardstock paper with smooth texture (size A4 or smaller as it needs to fit in the baking/food tray)
· Salt
· Liquid water colours in red, orange, yellow, pink, purple, blue and green (alternatively, mix food colouring with water)
· Paintbrush
· White glue

1. Prepare the bubble mix.
The bubble print is the first layer of your project. To start, mix bubble solution and blue food colouring in a deep plate. We used the IKEA KALAS plate for its high edge to contain the bubble solution.
You will be doing this step and all the following steps on the baking/food tray for easy clean-up.
2. Blow bubbles.
Insert straw into the plate and blow bubbles. Experiment with different bubble formations. For bigger bubbles, blow softly and slowly. For clumps of smaller bubbles, blow rapidly.
3. Press cardstock paper gently onto the bubbles for your bubble print.
To “print” the bubbles, gently press cardstock paper onto the bubble formations before they die down. Feel free to repeat steps 2 and 3 until you’re satisfied with the result (i.e. once your paper is sufficiently covered in bubble print), then let it dry or use a hair dryer for faster drying.
4. Create your second layer – the jellyfish.
On your bubble print, make a jellyfish with white glue. Feel free to draw the jellyfish with pencil first before going over it with glue.
5. Sprinkle salt over your jellyfish.
This part may get messy, which is why it’s done in the baking/food tray. Once you’ve adequately covered up the glue, tilt your paper to get rid of the excess salt. Let your salted jellyfish “set” (approximately 5-10 minutes).
6. Paint jellyfish with liquid watercolours.
Now it’s time to give your jellyfish the “rainbow” effect! Again, if you don’t have liquid watercolours, simply mix food colouring with water to colour your salted jellyfish. You only need to gently dab the paintbrush onto the salt as the colours will travel and blend easily.
7. Glue on googly eyes.
Your jellyfish bubble print is complete! The salt painting is at its most vibrant when the water colours are wet, so be sure to snap a photo of your work. Did you enjoy the process of creating this craft with your kids? We hope you’ll go for more bubble prints and salt painting designs in the future!
For the latest updates on Wonderwall.sg, be sure to follow us on TikTok, Telegram, Instagram, and Facebook. If you have a story idea for us, email us at [email protected].


: Play Retro Games")