

")

")


This Moon Rabbit Lantern Is The Perfect Mid-Autumn Festival Craft
The Mid-Autumn Festival calls for lantern-toting strolls under the full moon with loved ones. There’s something about holding our kids' sweaty little hands through the streets, and seeing their excitement at every brightly lit lantern that makes the whole experience more enjoyable. So here’s a special way to bring some tradition into your experience: by doing a DIY lantern festival craft with your kids at home.
Before we get started, some background: This DIY "Moon Rabbit" lantern draws inspiration from the Chinese legend, which tells of a selfless rabbit who sacrificed itself for the immortals, and was thus rewarded with immortality on the moon. During your lantern walk, see if you and your kids can spot the legendary rabbit in the moon.
In the meantime, if you’re ready to make your lantern, let’s begin.
You’ll need…
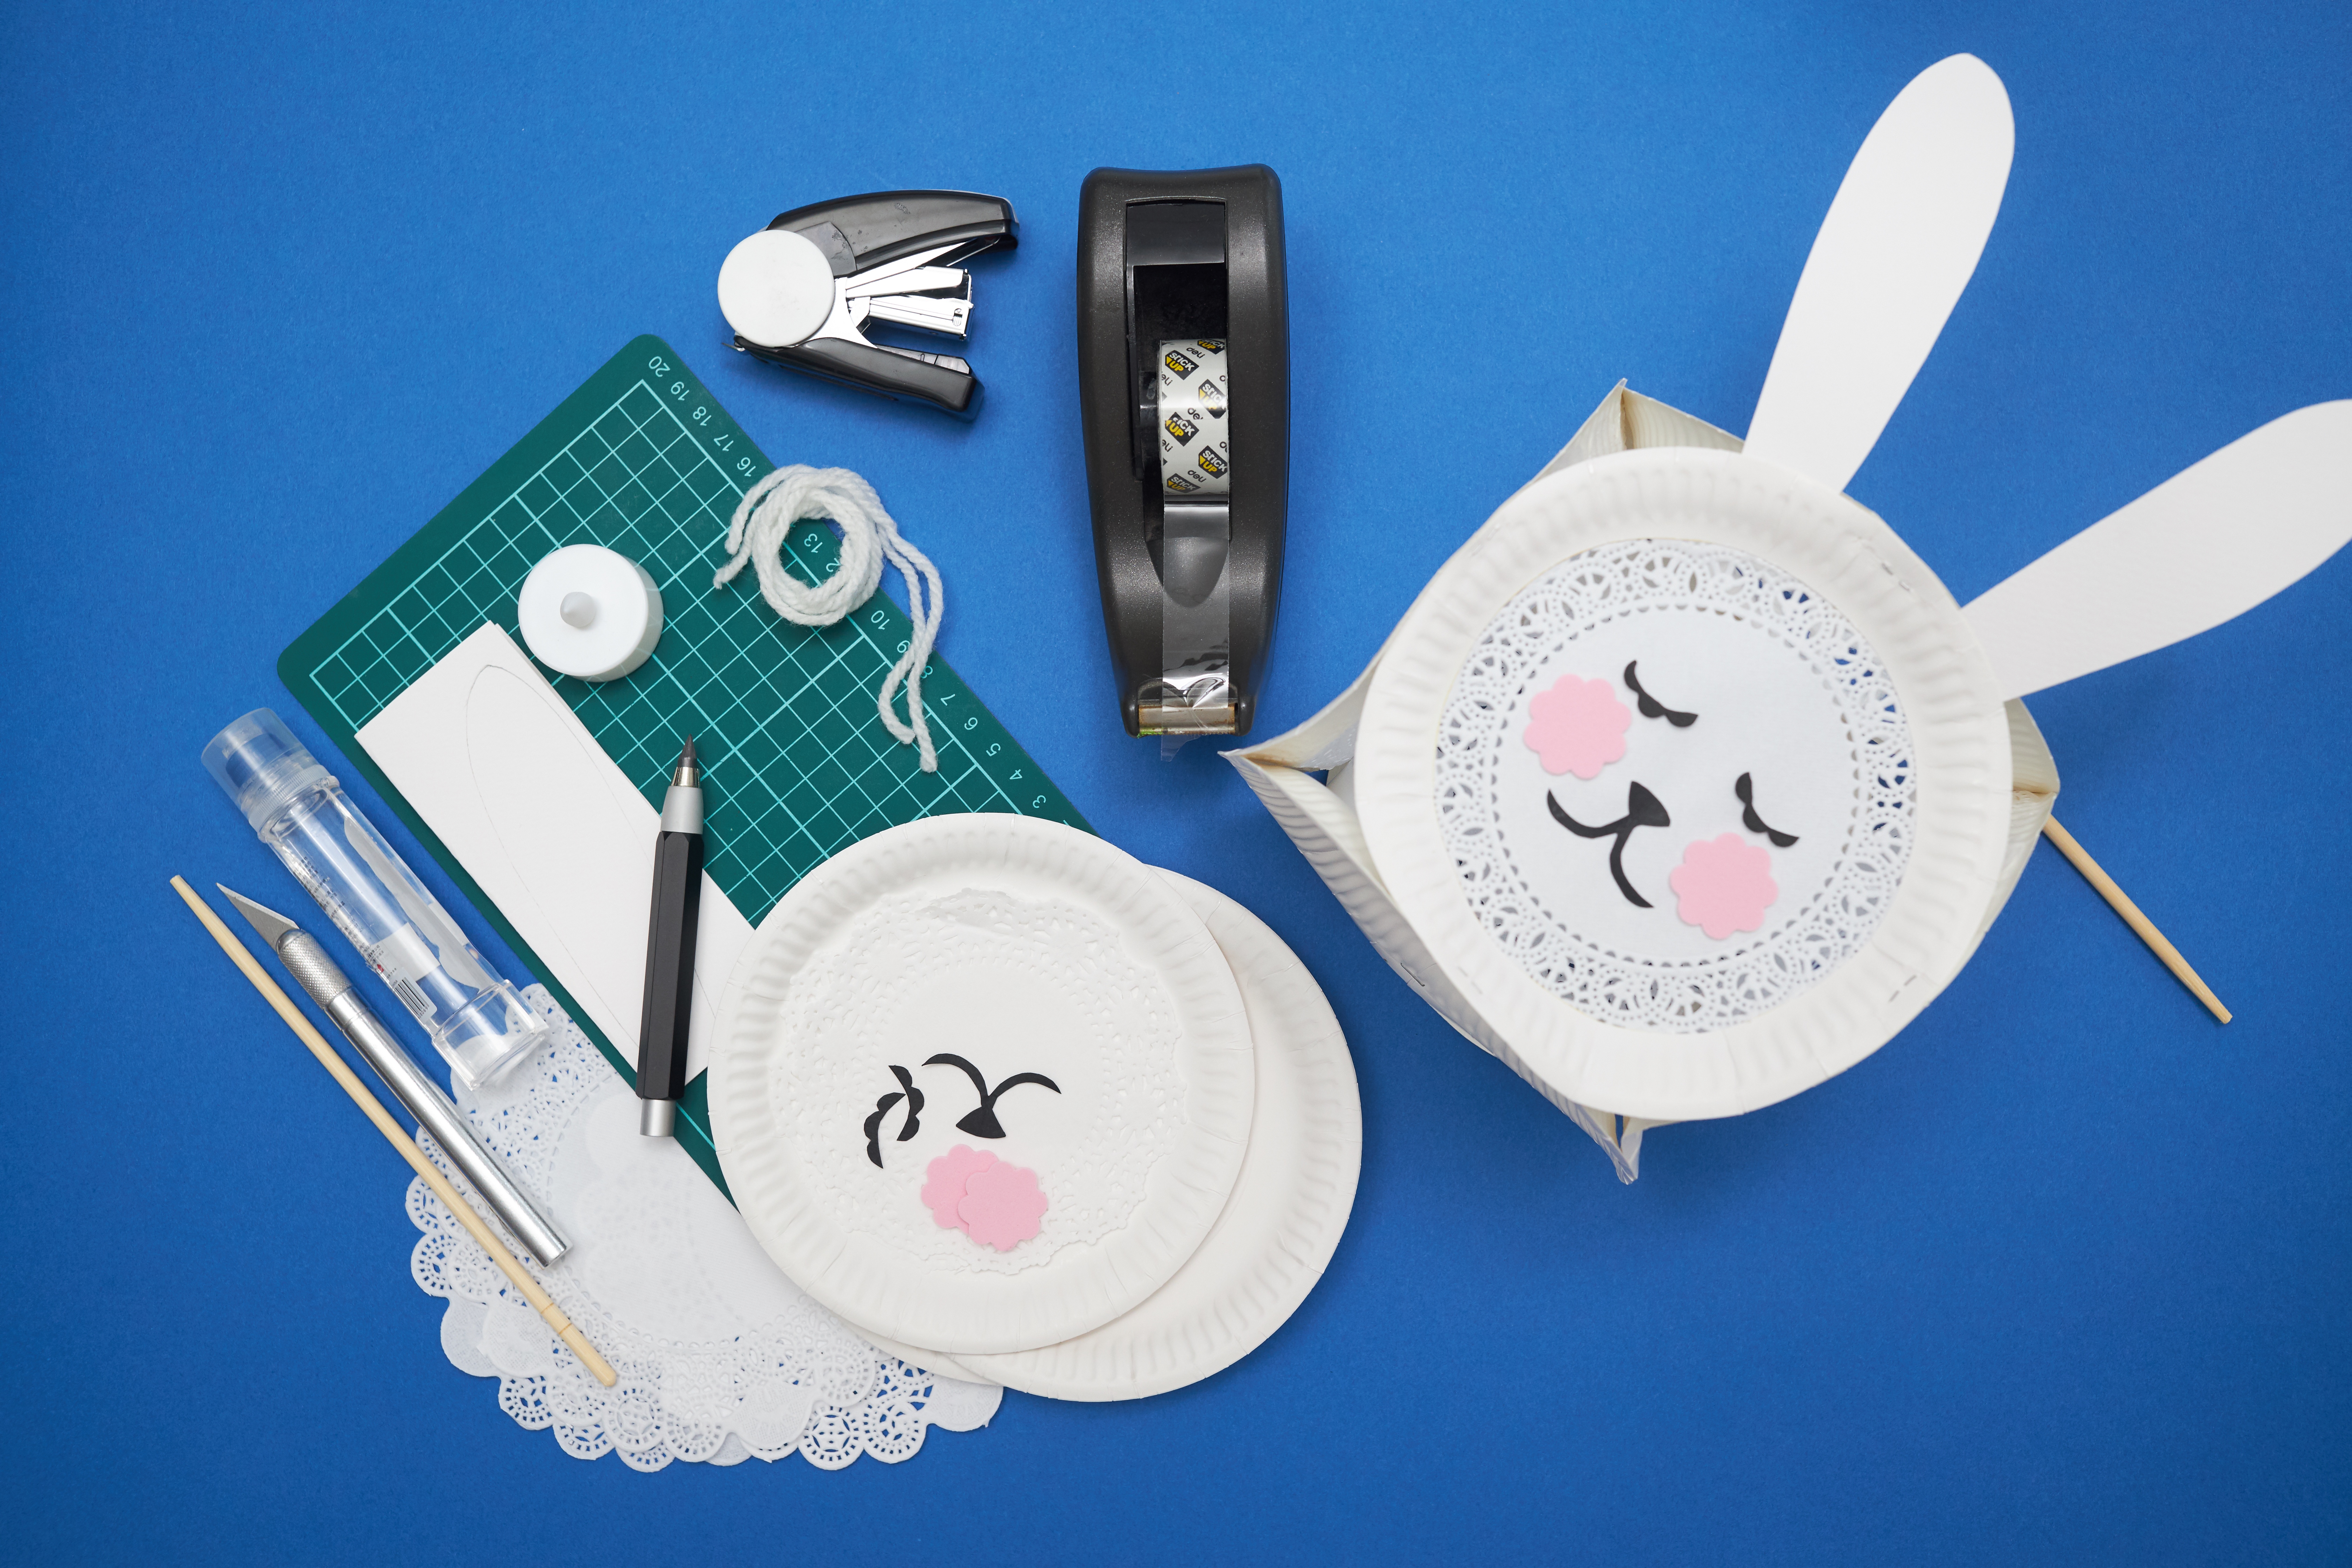
- 6 paper plates
- 4 paper lace doilies
- White, pink, and black construction paper
- 2 pieces of yarn or string, approximately 40 cm each
- Wooden stick
- Tape
- Glue
- Stapler
- Scissors
- Craft knife
- Flameless tealight
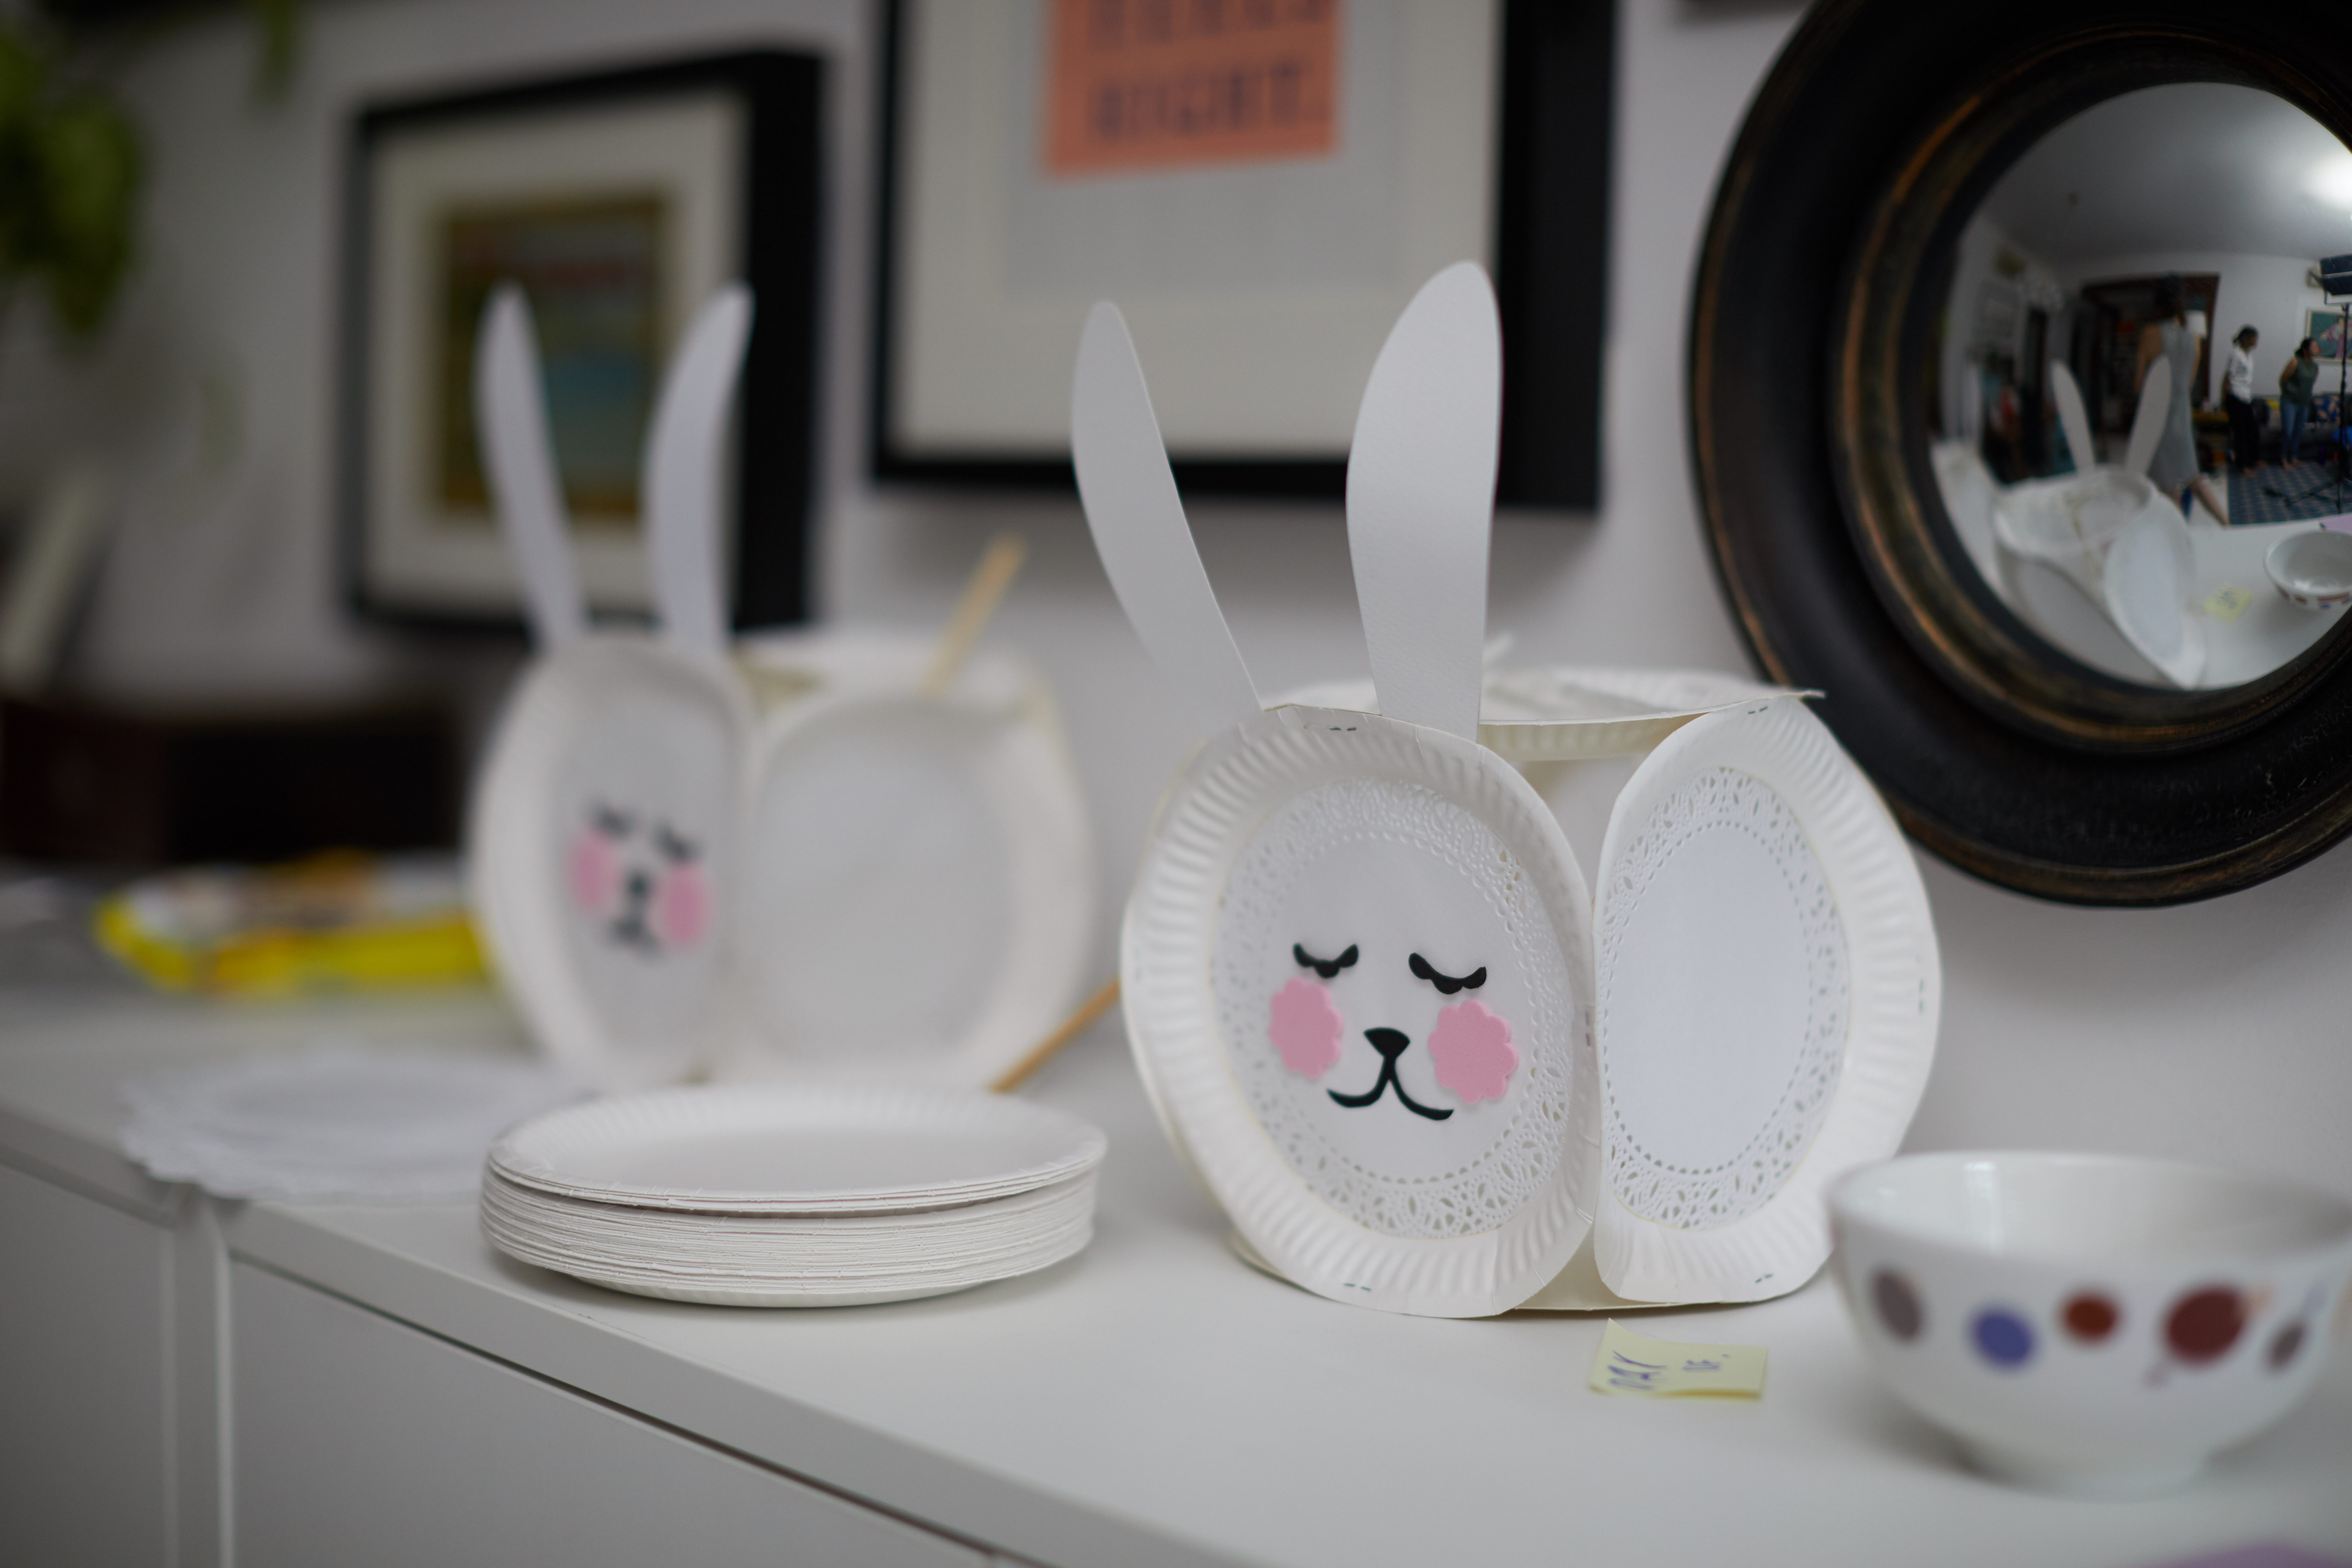
1. Make the top of the lantern.
Take a paper plate and cut out a circle. (Optional: Trace a cardboard circle template to create a perfect circle.)
On the paper plate frame, use a craft knife to cut 4 openings (for your lantern strings later). This paper plate will form the top of your lantern.
2. Make the four lantern sides.
Next, take four paper plates and trace and cut out a circle from each, using a cardboard circle template if you’d like. Glue a paper lace doily over each circle opening, and allow the glue to dry. These four plates will form your lantern sides.
3. Assemble the lantern.
Your six paper plates are now ready to be assembled: one top plate (that you made in Step 1), four lantern sides (that you made in Step 2), and one plain bottom plate. Staple these six plates together, forming a boxy lantern structure.
4. Draw, cut and glue on the rabbit’s eyes, nose, mouth, cheeks and ears.
Create the rabbit’s face. Use black construction paper for its eyes, nose, and mouth. Use pink construction paper for its cheeks, and white for its ears.
Experiment with your rabbit’s features and expression. For instance, we chose to make a sleeping rabbit, so ours had closed eyes. Its pink cheeks were scalloped-edge circles to look more decorative. Create your own rabbit’s face to your liking!
5. Make the lantern handle.
Take two pieces of yarn or string and tie four knots on the ends of each piece. Pull the four knots through the four openings on the lantern top plate. Attach the strings to a wooden stick with tape.
6. Light it up.
Switch on your flameless tealight, place it inside the lantern and tape it to the bottom plate. Now you’re ready to take your DIY lantern for a stroll!
For the latest updates on Wonderwall.sg, be sure to follow us on TikTok, Telegram, Instagram, and Facebook. If you have a story idea for us, email us at [email protected].


